How to live stream an event to Facebook or YouTube
Quick answer: To live stream an event on Facebook or YouTube, you need a camera, microphone, streaming software (like OBS Studio or Digital Samba), and a stream key from the platform. Connect your encoder to the platform using the stream key, test your setup with a dry run, and go live. For professional events, consider a dedicated webcam, external mic, proper lighting, and a wired internet connection. Read on for the full step-by-step guide.
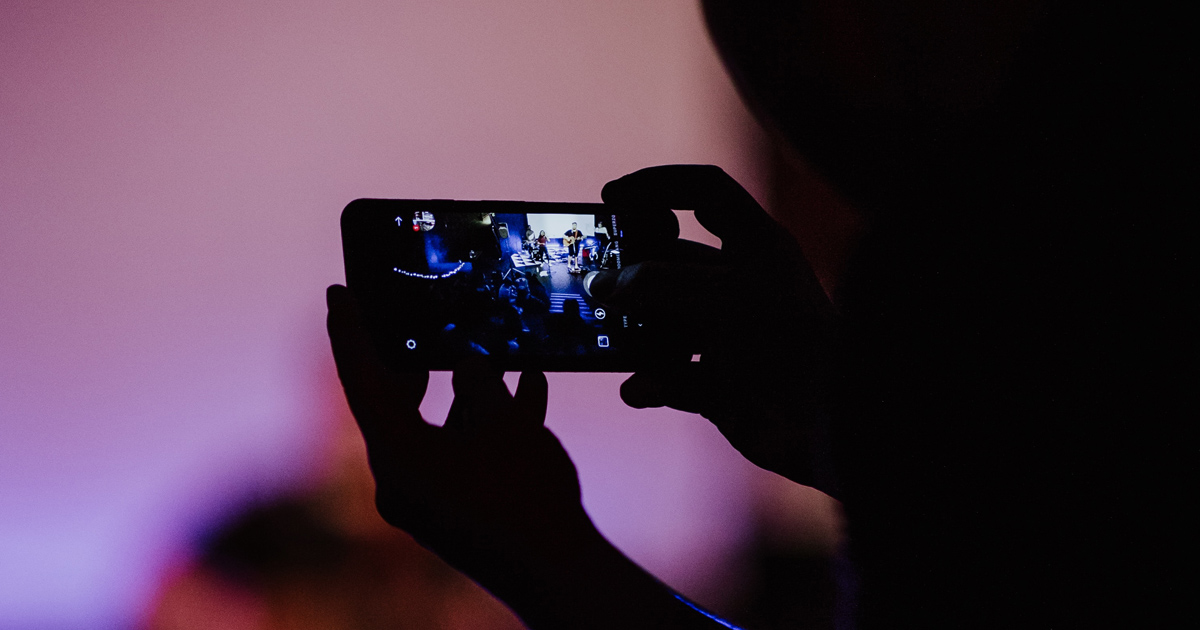
Live streaming to platforms like Facebook and YouTube has become an essential tool for creators, educators, and businesses. Whether you're hosting a concert, webinar, or community event, understanding how to stream professionally can elevate your content and boost engagement.
This guide walks you through everything you need—from basic tools to advanced setups—and helps you avoid common pitfalls while ensuring your stream looks and sounds great.
Table of contents
- What do you need to go live on Facebook or YouTube
- What’s new in Facebook and YouTube Live Streaming
- Understanding stream keys and platform setup
- How to webcast a live event
- Understanding RTMP: the technology behind live streaming
- Avoiding platform violations and copyright issues
- Promoting and scheduling your stream
- Preparing your live content and script
- Dry run and test your setup
- Live streaming hybrid and conference events
- Bonus tips for better live streaming quality
- Final thoughts
- Frequently asked questions
What do you need to go live on Facebook or YouTube
Facebook and YouTube both offer built-in “Go Live” functionality that allows anyone to stream video directly from their mobile device with just a few taps. This is great for casual or impromptu streams, such as sharing moments with friends or giving quick updates to your followers. However, if you’re aiming for a more professional, polished, and engaging experience, particularly for business events, interviews, or branded content, a more robust setup is essential.
A professional setup not only improves video and audio quality but also builds credibility with your audience and keeps viewers engaged for longer. Here’s what you’ll need:
A dedicated webcam or DSLR camera
Your device’s built-in camera can work in a pinch, but it usually lacks the resolution, focus control, and depth-of-field of an external webcam or DSLR. A 1080p or 4K webcam ensures crisp visuals and a more flattering image, while DSLR or mirrorless cameras, paired with a capture card, offer broadcast-level video quality.
An external microphone for clearer audio
Audio is just as important as video—if not more. Poor sound quality is one of the fastest ways to lose viewers. An external USB or XLR microphone significantly improves vocal clarity and removes background noise. Lavalier mics, shotgun mics, or even podcasting mics can suit different environments and speaking styles.
Proper lighting (ring light or Softbox)
Lighting dramatically affects how you appear on camera. Ring lights and softboxes help eliminate harsh shadows, brighten your face evenly, and make you stand out from your background. Natural light can work, but it’s unpredictable, so having consistent lighting ensures a reliable, professional look.
A neutral or branded background
A clean, clutter-free background minimises distractions and enhances the viewer’s focus on your message. You can use a plain wall, branded signage, or a virtual background—just ensure it doesn’t interfere with your video quality.
Tip: green screens work best with good lighting and high-resolution cameras.
A reliable laptop or desktop
Live streaming is resource-intensive. A computer with a modern CPU, ample RAM (16 GB+ recommended), and a dedicated graphics card will help avoid lags or crashes during your broadcast. Make sure your device can handle the demands of streaming software and connected equipment without overheating.
Streaming software
To send your video feed to Facebook or YouTube, you’ll need a streaming solution. OBS Studio is a free and popular choice among streamers. Tools like vMix offer more professional features, and browser-based platforms like Digital Samba remove the need for software installation entirely—perfect for those who want a sleek, plug-and-play experience with built-in scheduling and privacy features.
What’s new in Facebook and YouTube Live Streaming
Before diving into setup details, it’s important to be aware of recent changes introduced by both platforms that could affect how you stream and manage your content.
YouTube updates
-
Easier monetisation: YouTube has lowered its monetisation thresholds. As of 2024, creators only need 500 subscribers, 3,000 watch hours in the past 12 months, or 3 million Shorts views in 90 days—plus 3 public uploads—to access features like Super Chat and channel memberships.
-
AI inspiration tools: YouTube Studio now includes an "Inspiration" tab that uses AI to generate content ideas and video outlines, making it easier to plan your stream topics.
-
Better audience analytics: Creators can filter engagement metrics based on new vs. returning viewers, allowing for smarter content adjustments post-stream.
Facebook Live updates
-
30-day video retention policy: Starting February 2025, Facebook will automatically delete live videos from profiles and pages after 30 days unless saved or downloaded manually. Creators are encouraged to download or convert their videos to Reels before expiry.
-
Groups API removed: As of April 2024, third-party apps can no longer stream directly to Facebook Groups using the Groups API. You can still use RTMP streams, but some interactive features, like in-stream comments, may be limited.
Tip: Regularly reviewing these platform-specific changes ensures you stay compliant and get the most out of your live broadcasts.
Understanding stream keys and platform setup
To connect your streaming setup to platforms like Facebook or YouTube, you’ll need to understand one critical concept: the stream key. Think of it as a digital handshake—a unique identifier that tells the platform you’re authorised to stream and where to send your video.
If you’re using a streaming application like OBS, vMix, or browser-based tools such as Digital Samba, your stream won’t go live until the correct stream key is in place.
What is a stream key?
A stream key is a unique code generated by the platform (e.g. YouTube or Facebook) when you schedule or initiate a live event. Your streaming software uses this key to send your video and audio feed to the correct location on the platform.
Without the right stream key:
- Your broadcast won’t reach your channel or audience.
- You may accidentally stream to the wrong page or destination.
- Your stream could fail to start altogether.
How to find your stream key
For YouTube Live:
- Open YouTube Studio.
- Click "Go Live".
- Create a new stream or event.
- Under "Stream Settings", you’ll find the stream key.
- Copy and paste it into your encoder (e.g. OBS or Digital Samba).
For Facebook Live:
- Go to Live Producer via your profile, page, or group.
- Choose "Use Stream Key".
- Copy the stream key and enter it into your streaming software.
Note: You can choose whether the key changes with each stream or remains persistent.
Mobile devices handle it for you
If you're streaming directly from your smartphone using the Facebook or YouTube app, you won’t have to deal with stream keys manually. The apps manage this in the background, making it quick and user-friendly.
However, the trade-off is that you're limited to the camera and mic quality of your phone, and you won’t have access to the full feature set of professional streaming tools (like overlays, scene switching, or external audio sources).
Using a stream key gives you:
- Control over where and when your stream goes live.
- The ability to schedule streams in advance and prepare accordingly.
- Integration with multiple platforms and external tools, depending on your setup.
It’s also crucial for multi-streaming and advanced workflows—like broadcasting simultaneously to Facebook and YouTube using services like Restream.io (if permitted by the platforms).
How to webcast a live event
If you've come across the term "webcasting" and wondered how it differs from live streaming, you're not alone. The two are closely related, but webcasting typically refers to a more structured, professional broadcast – often for corporate events, conferences, training sessions, or investor presentations.
What's the difference between a webcast and a live stream?
A live stream is typically informal, interactive, and often broadcast to social platforms like Facebook or YouTube. Anyone can join, and the emphasis is on real-time engagement through chat and reactions.
A webcast, on the other hand, tends to be:
- Planned and produced – with a clear agenda, prepared speakers, and often a production team
- Gated or registration-based – attendees usually register in advance, which makes webcasts useful for lead generation
- One-to-many – the audience watches and listens, with interaction limited to Q&A, polls, or chat moderation
- Embedded on a branded platform – rather than hosted on social media, webcasts often live on the organiser's own website
In practice, the technical setup is similar. You still need a camera, microphone, encoder, and a reliable internet connection. The key difference is in the presentation, audience management, and where the content is hosted.
When to webcast instead of live stream
Choose a webcast when:
- You need to capture attendee data (registrations, emails)
- The event is corporate, educational, or requires a polished presentation
- You want full control over branding and user experience
- Privacy matters – you don't want the content publicly available on social media
- You need analytics on who attended, how long they stayed, and what they engaged with
Setting up a webcast
The equipment is the same as for any live stream. The main difference is the platform:
- Social platforms (Facebook, YouTube) are great for reach but give you limited control over branding and audience data
- Dedicated webcast platforms (like Digital Samba) let you embed the stream on your own website, apply custom branding, control access with registration, and capture detailed analytics
With Digital Samba Embedded, you can host a fully branded webcast on your own domain. Your audience sees your branding, not a third-party platform's. Combined with features like breakout rooms, polls, Q&A, and recording, it works for everything from product launches to all-hands meetings.
For the technical setup – webcasts use the same RTMP or WebRTC protocols as live streams. The next section explains how that works.
Understanding RTMP: the technology behind live streaming
When you click "Start stream" in OBS or any other encoder, your video and audio are sent to Facebook or YouTube using a protocol called RTMP – Real-Time Messaging Protocol.
You don't need to understand RTMP deeply to stream, but knowing the basics helps when things go wrong – and makes it easier to set up more advanced workflows like multistreaming or embedding streams on your own website.
How RTMP works (simplified)
- Your encoder (OBS, vMix, or a platform like Digital Samba) captures your camera and microphone feed
- It compresses the video/audio into a streamable format
- It sends that compressed feed to an RTMP server URL using the stream key you obtained from Facebook or YouTube
- The platform receives the feed and distributes it to your viewers, usually converting it to HLS (HTTP Live Streaming) for playback in browsers
The stream key is what connects your encoder to the correct destination. Without it, the platform doesn't know the feed is coming from you.
Why RTMP still matters in 2026
Despite being an older protocol (originally developed for Adobe Flash), RTMP remains the standard for live stream ingestion. Facebook, YouTube, Twitch, LinkedIn Live, and virtually every streaming platform accept RTMP input.
Newer protocols like SRT (Secure Reliable Transport) are emerging for higher-quality feeds, but RTMP's universal compatibility makes it the safe default for most streamers.
Using RTMP with Digital Samba
Digital Samba supports RTMP restreaming through its API. This means you can run a live session in Digital Samba – with all its interactive features like polls, Q&A, breakout rooms, and screen sharing – and simultaneously broadcast that session to Facebook, YouTube, or any RTMP-compatible endpoint.
Here's how it works:
- Create a session via the Digital Samba API
- Set the
live_stream_endpointparameter with your RTMP destination URL (including the stream key) - Start your Digital Samba session – it automatically sends the stream to the external platform
- Your audience can join the interactive session on your website AND watch the broadcast on Facebook/YouTube
This hybrid approach gives you the best of both worlds: interactive engagement for your core audience via Digital Samba, and broad reach through social platforms.
For a deeper technical dive into RTMP, see our comprehensive RTMP guide. For a comparison of streaming protocols, check out RTMP vs RTSP and HLS vs RTMP.
How to live stream an event with Digital Samba (step by step)
Digital Samba runs your event as a browser-based room and broadcasts it out to the platforms you choose using its built-in Restreamer – there is no encoder to configure and nothing for your presenters to download. Here is the full process, from empty room to live audience.
1. Create your event room
Sign in to Digital Samba and create a room for your event. Everything runs in the browser, so your presenters simply open a link – there is nothing to install. Room creation is available on the free plan, so you can set this up before committing to anything.
2. Add presenters and set roles
Invite your speakers and assign roles so the right people can present, moderate and control the session. Use the waiting room and the pre-join screen so everyone checks their camera, microphone and connection before you go live.
3. Connect your streaming destination
Open the Restreamer from the room toolbar and choose where you want to broadcast. You can stream straight to YouTube, Vimeo or Cloudflare, or paste a custom RTMP URL and stream key to reach Facebook Live, LinkedIn Live, Twitch or any other RTMP platform. If you need to find your stream key first, see the stream-key section earlier in this guide.
4. Go live
Click the restream button to start broadcasting your room to the connected platform. Click it again to stop. If you would rather not manage this manually, you can set the room to begin streaming automatically the moment the first participant joins.
5. Engage your live audience
Because the event lives inside a full meeting room, your interactive tools run alongside the broadcast: Q&A, polls, quizzes, live chat and hand-raise, with moderation controls to keep the session under control. This is what turns a one-way stream into a genuine event.
6. Record and repurpose
Record the session to the cloud for on-demand replays, and use the built-in AI transcript, summary and captions to turn a single live event into clips, recaps and accessible content afterwards.
For developers: everything above can be driven through the API and SDK on Digital Samba Embedded – start and stop the stream with the startRestreaming() method, subscribe to webhooks for stream events, and run the whole experience white-labelled under your own domain.
Bringing in professional cameras: for multi-camera conferences or hybrid events, you can inject an external OBS or WHIP-compatible feed directly into the room and then restream it out – so your polished production and your interactive audience live in the same place.
Ready to run your next event? Start free with Digital Samba and stream your first event to YouTube, Facebook or your own platform in minutes.
Avoiding platform violations and copyright issues
Live streaming comes with more than just technical considerations—you also need to follow the terms of service and copyright policies of the platforms you're using. Ignoring these rules can result in:
- Your stream is being taken down mid-broadcast
- Your account being flagged or suspended
- Losing access to monetisation or visibility tools
Whether you're using Facebook Live, YouTube Live, or a combination of platforms, it’s essential to know the do’s and don’ts.
Multistreaming: know the limits
Multistreaming—broadcasting your live event to multiple platforms at the same time—can be powerful for reach. But it’s not always allowed depending on the platform’s rules.
- Facebook’s policy generally discourages streaming to Facebook and other platforms simultaneously using the same feed, unless you're using approved tools or features.
- YouTube, as of 2025, permits multistreaming, but you may need to disable monetisation for streams that include third-party platforms.
- Twitch historically restricted multistreaming for affiliates and partners, though policies have become more relaxed with recent updates.
Tip: If you're using a third-party service like Restream, check each platform’s terms to make sure you're compliant.
Avoid copyrighted content
Using copyrighted music, video clips, or images—intentionally or unintentionally—can automatically trigger takedowns or muting, even during a live stream.
Common copyright traps:
- Background music playing in your room
- Clips from TV, films, or YouTube videos
- Unlicensed visuals or logos
- Playing Spotify or Apple Music tracks during a live DJ set
Both Facebook and YouTube use automated content detection systems (like Content ID) that scan for copyright violations in real time. Even a few seconds of copyrighted material can result in your stream being blocked.
Pro tip: Use royalty-free or properly licensed content. Many streamers rely on libraries like Epidemic Sound, Artlist, or YouTube’s Audio Library for safe background music.
Read the fine print
Always check the latest terms before going live—platform rules change regularly, especially around:
- Age restrictions and viewer targeting
- Promoting commercial services or third-party products
- Broadcasting sensitive or controversial content
Each platform provides a Live Streaming Policy or Community Guidelines page:
Ignoring these can affect not just one stream but your entire account reputation.
Promoting and scheduling your stream
Even the most well-produced live stream will fall flat if no one shows up. Promotion and scheduling are key to attracting an audience and maximising engagement. Unlike pre-recorded videos, live events happen in real time—so if your viewers aren’t ready, you miss the moment.
Fortunately, platforms like Facebook and YouTube offer tools to schedule streams, send reminders, and notify followers automatically. But relying solely on algorithms is risky. A strong promotion strategy ensures that your event doesn’t get lost in the noise.
Why you should always schedule in advance
By scheduling your live stream ahead of time, you:
- Give your audience time to prepare and plan
- Allow the platform’s notification system to do its job
- Create a shareable link for promotional emails and social posts
For example, YouTube’s "Premiere" feature lets viewers set reminders, join a live chat before the stream begins, and receive alerts when you go live. Facebook Events work similarly, allowing people to RSVP and get notified automatically.
Promote like an event, not just a video
Treat your stream like a real-world event. The more places you share the announcement, the more likely people are to show up.
Promotion checklist:
- Post countdown teasers and reminders on social media
- Create an event on Facebook or LinkedIn
- Embed the stream or promo banner on your website
- Email your newsletter subscribers with the link and details
- Share behind-the-scenes prep to build excitement
And don’t stop promoting after the event. Turn the replay into a lead magnet, content snippet, or recap blog post.
Use reminder tools and automations
If you’re using a streaming platform with integrated marketing features you can:
- Schedule live events in advance
- Send email reminders and calendar invites
- Share branded event pages with custom CTAs
This kind of integration is especially useful for webinars, workshops, and virtual conferences, where pre-registration and attendance rates matter.
Plan around time zones
If your audience is global, pick a time that works for as many viewers as possible—or offer multiple sessions. Tools like World Time Buddy or Google Calendar can help you coordinate time zones.
You can also stream a replay at a different time using scheduled broadcasts, giving people a second chance to attend without compromising the live feel.
Plan it, promote it, remind them.
Scheduling your stream and promoting it like a real event will significantly boost attendance and viewer engagement. Platforms like YouTube and Facebook help, but a proactive promotion plan will put your live stream on the map.
Preparing your live content and script
Live streaming may feel spontaneous to the viewer—but behind the scenes, the best broadcasts are built on preparation and purpose. Whether you’re running a product demo, hosting an interview, or teaching a class, having a clear content plan helps you stay focused, deliver value, and make a strong impression.
Think of your live stream like a stage performance: while improvisation adds charm, having a structure keeps everything on track.
Start with an outline or script
You don’t need a word-for-word script—but you do need a roadmap. Start with:
- A welcome message and quick intro
- Your main talking points or segments
- Any calls to action (e.g. “Subscribe”, “Ask questions”, “Download the guide”)
- A closing statement or wrap-up
Even just jotting down 3–5 bullet points can help you stay organised and ensure you cover everything you intended.
Define the purpose of the stream
Before you go live, ask yourself:
- What’s the goal? (Educate, promote, entertain, answer questions?)
- What action should viewers take afterwards?
- How will I measure success—views, engagement, conversions?
Having this clarity will help you design the flow and keep the audience engaged from start to finish.
Prepare supporting materials in advance
If you're planning to show slides, share links, or display screen shares, make sure everything is queued up and ready to go.
Pre-stream checklist:
- Load presentations or tabs before going live
- Shorten URLs you’ll share (using Bitly or your own domain)
- Prepare visual overlays or lower thirds in your streaming software
- Have a moderator or assistant ready to drop links in the chat
Digital Samba allows you to upload and manage content in advance, so everything’s at your fingertips when you go live.
Plan for interaction
Live streaming isn’t just about broadcasting—it’s about connecting.
Ways to interact:
- Greet new viewers as they join
- Ask questions and respond to chat
- Run polls or ask for emoji reactions
- Address viewer comments in real time
Tip: Write out 1–2 “fallback questions” you can use if interaction slows, such as “Where are you tuning in from?” or “What’s your biggest challenge with [topic]?”
Practice talking points out loud
Practising aloud—even once—can reveal awkward phrasing, help with timing, and reduce nerves. If you're working with co-hosts or guests, a quick run-through or pre-call can save you from tech hiccups and overlapping speech.
While live events have an exciting edge of unpredictability, a bit of planning goes a long way. With a basic script, clear goals, and materials prepped, you’ll look more confident, stay on message, and deliver a stream that feels both natural and valuable.
Dry run and test your setup
One of the most common—and avoidable—reasons for failed live streams is a technical issue. Frozen video, echoing audio, unstable internet—these problems can frustrate your viewers, damage your credibility, and cause you to lose momentum fast.
That’s why a dry run (test broadcast) is essential before every live event, no matter how experienced you are. Think of it as a rehearsal to spot and fix potential problems before your audience sees them.
What is a dry run?
A dry run is a complete simulation of your live stream, using the exact equipment, platform, and software setup you’ll use on the day of your event. You test everything:
- Internet stability
- Audio levels
- Lighting and camera framing
- Screen shares and overlays
- Stream key connection to the platform
This lets you confidently go live, knowing all systems are ready.
Live streaming hybrid and conference events
Streaming a conference, summit, or hybrid event has different requirements than streaming from a home office. The stakes are higher, the setup is more complex, and there are more moving parts to manage.
What makes conference streaming different
- Multiple cameras – A single webcam won't cover a stage presentation, audience shots, and speaker close-ups. Multi-camera setups with a video switcher let you cut between angles.
- Professional audio – Room microphones, lavalier mics for speakers, and audio mixers ensure the in-room sound translates well to online viewers.
- Dedicated internet – Event venues often have shared Wi-Fi that can't handle streaming bandwidth. A dedicated, wired internet connection (minimum 10 Mbps upload) is essential.
- A production team – Someone needs to manage the stream, switch cameras, monitor audio levels, and handle technical issues in real time.
- Hybrid audience management – Remote viewers need to feel included, not like an afterthought. This means dedicated moderation for the online chat, clear audio for remote viewers, and potentially separate Q&A channels.
Tips for hybrid event streaming
- Test the venue's internet well in advance – don't trust their stated speeds without verification
- Have a backup connection (mobile hotspot or bonded cellular)
- Use a hardware encoder for reliability – software on a laptop is more prone to overheating and crashes during long events
- Brief in-room speakers on how to engage the remote audience (e.g., repeating questions from the chat, looking at the camera)
- Record everything locally as a backup, even if you're streaming live
Streaming a conference with Digital Samba
For conferences where you want interactive features alongside the broadcast, Digital Samba's platform supports both:
- In-room participants view the live presentation and participate in discussions
- Remote attendees join via Digital Samba's web-based platform with full access to video, chat, polls, and Q&A
- Broader audience watches via Facebook or YouTube through RTMP restreaming
This three-tier approach lets you serve every audience segment without compromising on interactivity or reach.
Bonus tips for better live streaming quality
Once you’ve nailed the basics, small refinements can make a big difference. These bonus tips will help you stand out with sharper visuals, smoother interactions, and greater professionalism—even on a modest budget.
Whether you’re hosting a corporate webinar, a live Q&A, or a digital performance, these best practices will elevate your stream from “good” to “great.”
Use a second monitor for control
Running a live stream on a single screen can get overwhelming, especially if you're switching scenes, answering comments, or showing slides.
A second monitor helps you:
- Keep your streaming dashboard open without interrupting the broadcast
- Monitor chat and viewer stats in real time
- Preview scenes before making them live
- Respond to audience questions without cluttering your main screen
This setup makes multitasking manageable and reduces on-screen chaos.
Enable chat moderation and delay
Audience interaction is a highlight of live streaming, but it also opens the door to spam or disruptive comments, especially on public streams.
To protect your event:
- Appoint a moderator to manage the chat
- Enable delay filters to give you time to respond or remove inappropriate comments
- Use keyword blocking tools on platforms like YouTube and Facebook to filter offensive language
This is especially important for educational, corporate, or public-facing events where reputation matters.
Brand your stream with visual elements
Make your stream memorable by adding visual consistency that matches your brand:
- Display your logo or watermark on-screen
- Use custom overlays and lower-thirds to introduce speakers or topics
- Apply branded colour schemes and fonts in your scene design
- Add animated transitions for polish
You can create assets using tools like Canva or Adobe Express and upload them into OBS or your streaming platform.
Record the stream for replays
Always record your broadcast—even if it's live-only. The recording can be used to:
- Reach viewers who missed the live event
- Create shorter highlight clips or reels
- Repurpose content into blog posts, newsletters, or podcasts
Platforms like YouTube and Facebook archive your streams automatically. If you’re using a standalone tool, check if local or cloud recording is available.
Review analytics afterwards
After the stream, take a few minutes to check your stats:
- Viewer retention: Where did people drop off?
- Chat engagement: When were viewers most active?
- Watch time and reach: Did it meet your goals?
This feedback is gold—it helps you refine your format, pick better time slots, and understand your audience’s preferences. Most major platforms provide a post-stream analytics dashboard, or you can connect to third-party tools for deeper insights.
Final thoughts
Live streaming to Facebook or YouTube doesn’t need to be complicated, but it pays to be prepared. Whether you’re using free tools or a full production setup, planning your content, checking your gear, and understanding platform rules are key to a successful stream.
If you’re looking for a platform that includes built-in scheduling, reminders, privacy controls, and HD video quality, try Digital Samba. It’s ideal for events that need to go beyond social platforms.
Event platforms increasingly use embedded live video for event platforms to keep audiences inside their own branded experience instead of redirecting to YouTube or Zoom.
Frequently asked questions (FAQ)
A live stream is an open, often informal real-time broadcast – typically on social platforms like Facebook or YouTube. A webcast is a more structured, professional broadcast, usually registration-based, hosted on a branded platform, and designed for corporate events, training, or conferences. The technical setup is similar, but webcasts offer more control over branding, audience data, and privacy.
RTMP (Real-Time Messaging Protocol) is the standard protocol for sending live video from your encoder to a streaming platform. When you enter a stream key in OBS and click "Start streaming", you're sending an RTMP feed. Nearly every platform – Facebook, YouTube, Twitch, LinkedIn – accepts RTMP input. It matters because it's the bridge between your camera and your audience.
For a single HD (1080p) stream, you need a minimum of 5–10 Mbps stable upload speed. For 4K or multi-camera setups, aim for 20+ Mbps. Always use a wired ethernet connection rather than Wi-Fi for reliability. Test your actual upload speed from the venue before the event – advertised speeds often differ from reality.
Share this
You May Also Like
These Related Stories

HLS vs RTMP for Optimal Video Streaming Experience
Mastering YouTube Live Streaming