Default room settings let you configure your Digital Samba rooms once – branding, components, recording behaviour and join options – and have every room on your team inherit those choices automatically. You'll find them in the Rooms section of the dashboard, behind the 'Default room settings' button.
In this article, we'll look at where to find your default room settings, how room inheritance works, what you can configure in each tab of the panel, and how to save or undo your changes – with a worked telehealth example along the way.
Table of Contents
- What you'll need to get started
- Where to find your default room settings
- Why configure your default room settings?
- What you can configure, tab by tab
- Example: default settings for a telehealth set-up
- Saving your changes and resetting to factory settings
- Frequently asked questions
What you'll need to get started
Before you change any settings, make sure you have two things in place:
- An active Digital Samba account. If you haven't signed up yet, you can create a free account in a few clicks – it includes 10,000 participation minutes per month.
- Owner or administrator rights on your team. Only team owners and administrators can change the default room settings; members can't.
Once you're logged in, head to the Rooms section of the dashboard. This is where you create and manage rooms, and where the default settings live.
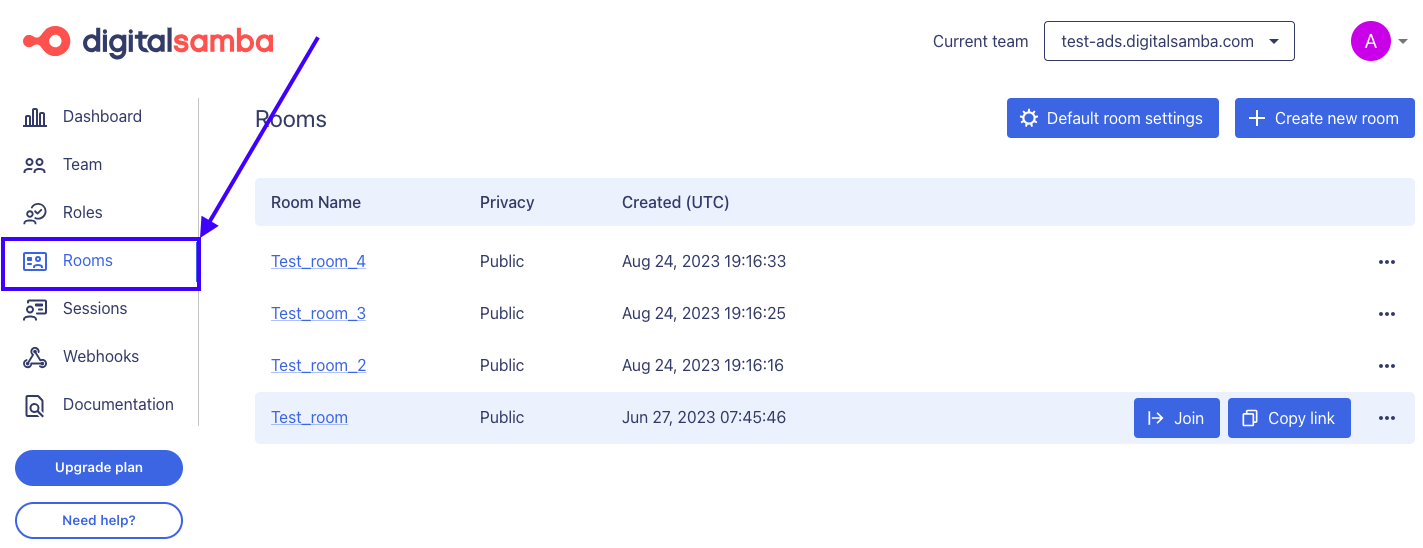
Where to find your default room settings
Within the Rooms section, there are two places to change settings. The 'Default room settings' button at the top opens the panel that applies to your whole team, while the 'Edit' option next to each room customises that one room only.
How room inheritance works in Digital Samba
Every room you create starts from your default room settings, and existing rooms keep following the defaults for any setting you haven't customised on that room individually. Change a default later and it flows through to all rooms that still rely on it – customised values stay untouched.
There are a few exceptions. Room privacy and the maximum number of participants are always set per room and never inherit from the defaults, and the 'Expires at' time can only be set when you create a room.
If you want to tailor one room without touching the rest, read our guide to configuring individual Digital Samba rooms in the dashboard. Prefer working in code? You can also configure your room defaults through the developer API.
Why configure your default room settings?
Setting your defaults once saves you from repeating the same configuration for every new room. Your logo, colours and layout stay consistent across all your meetings, which keeps your brand looking professional without any extra work per room.
Defaults also act as a safety net: if someone on your team creates a room in a hurry, it still comes with the features, recording behaviour and join flow you decided on.
What you can configure, tab by tab
Click the 'Default room settings' button to open the configuration panel. The settings are grouped into five tabs: General, Branding, Components, Recordings and Join settings.
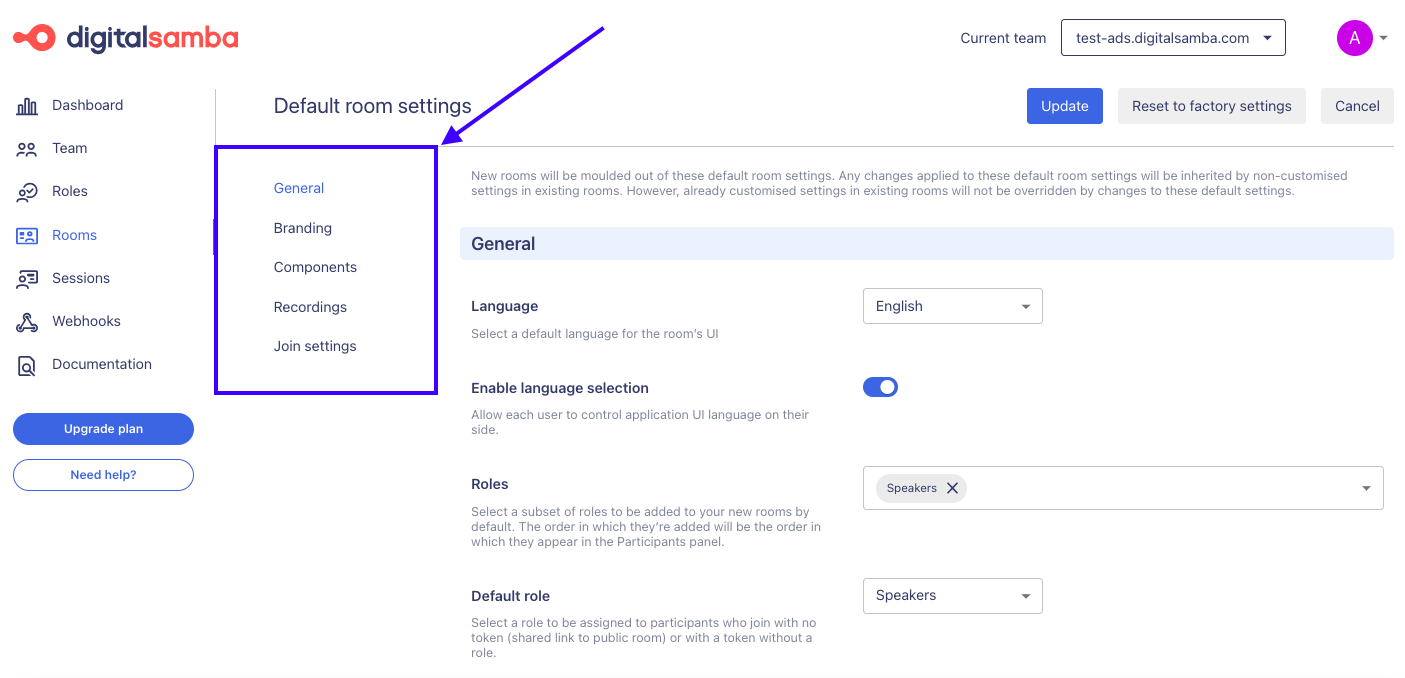
General settings
The general settings cover the room basics: the default interface language (and whether participants can switch it), which roles are available in your rooms and which one new joiners get by default, the session length, and an end-to-end encryption option for sensitive sessions. If you've built your own permission set-up, see our guide to custom roles in the Digital Samba dashboard.
Branding
In the branding tab you can upload your own logo, choose a light or dark appearance, and set the primary, background and toolbar colours to match your brand. You can also pick the toolbar position and write a lobby message for participants waiting to be let in.
Components
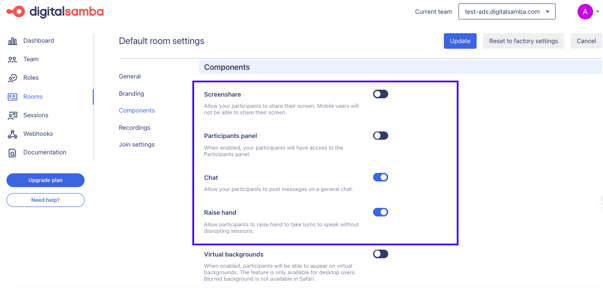
The components tab is a set of on/off toggles for the features participants see in the room: screen sharing, the participants panel, raise hand, emoji reactions, virtual backgrounds, the whiteboard, shared notes, picture-in-picture and more. Turning a component off here removes it from every room that follows the defaults.
Recordings
The recordings tab controls whether sessions can be recorded and how the recordings look: an auto or tiled layout, name badges and captions in the recording, and a consent reminder for whoever starts recording. You can also start recordings automatically when the first participant joins – including in breakout rooms.
Join settings
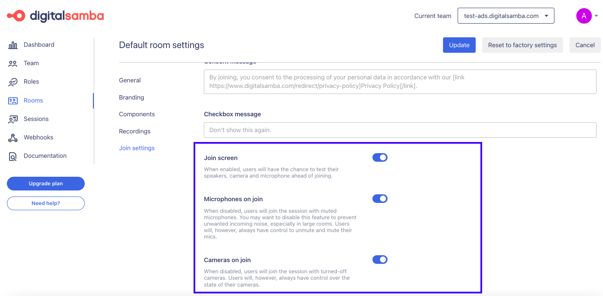
The join settings shape the first minute of every session: a consent message with a link to your privacy policy, a join screen where users test their camera, speakers and microphone before entering, and whether microphones and cameras are on or off at join. You can also set the layout mode on join and the default video and audio quality.
Example: default settings for a telehealth set-up
Say you run online consultations, where patients should get the same calm, predictable experience in every room. A sensible set of defaults would be:
- Disable screen share: patients rarely need to share their screen, so turning it off keeps the room simple.
- Turn off the participants panel: in a one-to-one consultation there's nothing useful in it for the patient.
- Enable raise hand: in group sessions, patients can signal they'd like to speak without interrupting.
- Set a consent message: in the Join settings tab, show patients a short notice with a link to your privacy policy before they enter – a natural fit for healthcare.
- Enable the join screen: letting patients test their camera, speakers and microphone ahead of the appointment means fewer sessions lost to technical trouble.
Saving your changes and resetting to factory settings
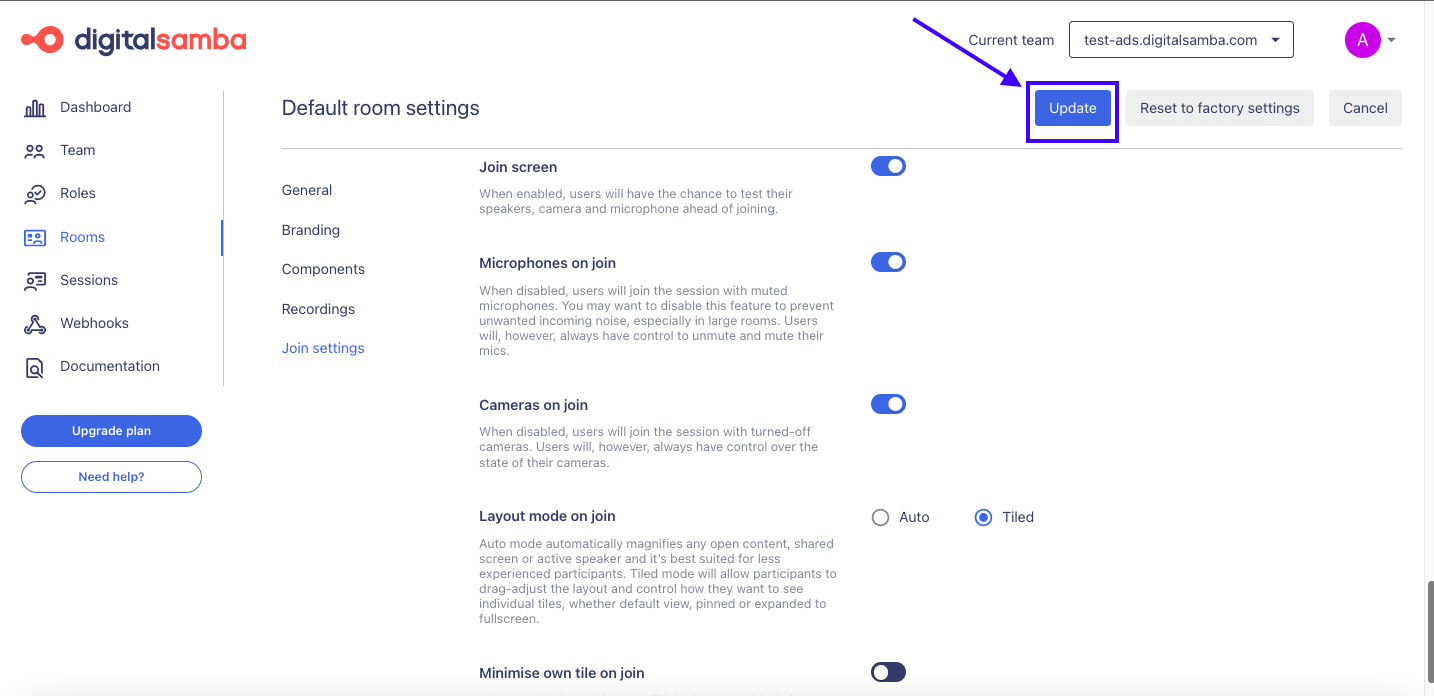
Once you've made your changes, click 'Update' at the top of the Default room settings panel to save them. The new defaults apply to every room you create from now on, and to any setting on your existing rooms that you haven't customised individually.
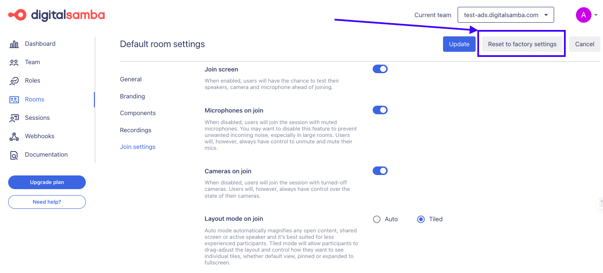
If you'd rather start over, the 'Reset to factory settings' button restores the defaults Digital Samba ships with. And if a single room has drifted too far from your standards, you can reset just that room to your defaults with its own 'Reset to default' option.
Frequently asked questions
Do default room settings change rooms I've already created?
Yes, partly. Existing rooms follow the defaults for every setting you haven't customised on that room individually, so a change to the defaults flows through to them. Settings you've already overridden on a specific room keep their custom values.
Which settings can't be set as defaults?
Room privacy and the maximum number of participants are always configured per room and never inherit from the defaults. The 'Expires at' time is also special – it can only be set at the moment you create a room.
Who can change the default room settings?
Only team owners and administrators can open and edit the Default room settings panel. Regular team members can't change the defaults, which protects your configuration from accidental edits.
Can I configure room defaults without the dashboard?
Yes. Everything in the Default room settings panel can also be set programmatically through the REST API, which is handy if you manage rooms from your own application. Our guide to configuring room defaults with the developer API walks through it.
How do I undo changes to my default room settings?
Click 'Reset to factory settings' in the Default room settings panel to restore the original defaults. For a single room, use that room's 'Reset to default' option instead – it re-aligns the room with your current team defaults.
The Digital Samba dashboard makes it easy to keep every room on your team consistent – set your defaults once and let inheritance do the rest. Create a free account to try it with 10,000 participation minutes per month, or talk to the team if you'd like help setting up video conferencing for your organisation.
Share this
How to Configure Your Team Settings with the Digital Samba Developer API
How to configure your Digital Samba Rooms using Dashboard